My Latest Drinks


browse recipes

- 2 cups fresh blueberries (or frozen, thawed) - 1/4 cup maple syrup (or honey) - 2 tablespoons chia seeds - 1 tablespoon lemon juice - 1 teaspoon vanilla extract - Pinch of salt - Other berries (strawberries, raspberries) - Spices (cinnamon, nutmeg) - Additional sweeteners (agave, coconut sugar) You need some simple ingredients to make blueberry chia seed jam. The main stars are fresh blueberries. You can also use frozen ones if needed. You will mix them with maple syrup for sweetness. If you prefer, you can swap it with honey. Chia seeds are the magic ingredient here. They help thicken the jam as they soak up liquid. Lemon juice adds a tangy touch, while vanilla extract brings out the blueberry flavor. A pinch of salt balances everything perfectly. Feel free to get creative! You can add other berries like strawberries or raspberries. Spices like cinnamon or nutmeg can enhance the taste too. If you want more sweetness, consider using agave or coconut sugar. This mix of ingredients makes your jam not only tasty but healthy too. For the full recipe, check out the instructions above. Enjoy making your homemade blueberry chia seed jam! 1. First, take 2 cups of fresh blueberries. You can also use frozen blueberries, just make sure they are thawed. 2. Place the blueberries in a medium saucepan. 3. Use a fork or a potato masher to gently mash the blueberries. This takes about 3-4 minutes. You want them to break down and release their juices. 4. Now, add in 1/4 cup of maple syrup or honey, 1 tablespoon of lemon juice, and a pinch of salt. Stir it all together. 1. Next, bring the mixture to a gentle boil over medium heat. 2. Once it boils, reduce the heat and let it simmer for about 5 minutes. Stir occasionally to keep it from sticking. 3. Remove the saucepan from the heat after simmering. 4. Stir in 2 tablespoons of chia seeds and 1 teaspoon of vanilla extract. This is where the magic begins! 1. Let the mixture sit for about 10 minutes. During this time, the chia seeds will absorb liquid and thicken the jam. 2. Taste the jam. If you want it sweeter, add more maple syrup. 3. Once it has thickened to your liking, transfer the jam to a clean jar. 4. Allow it to cool completely before sealing the jar. 5. Store your blueberry chia seed jam in the fridge for up to two weeks. Enjoy making this easy and healthy jam! Check out the Full Recipe for more details. - Adjusting chia seeds for thickness: If you want a thicker jam, add more chia seeds. Start with 2 tablespoons. If it's too runny, mix in another half tablespoon. Let it rest to see the change. - How to prevent burning: Cook over medium heat. Stir often to avoid sticking. If the jam begins to stick, lower the heat. - Experimenting with sweetness: You can adjust the sweetness by adding more maple syrup. Taste as you go. This way, you’ll find the perfect balance for your jam. - Alternative flavor profiles: Try adding spices like cinnamon or nutmeg for warmth. You can also mix in other fruits, like raspberries or strawberries, for a fun twist. - Best pairings: This jam tastes great on toast or warm scones. Spread it on your favorite breakfast items for a sweet start to your day. - Creative uses: Use the jam as a topping for yogurt or desserts. It also works well in oatmeal or as a filling for pastries. There are many ways to enjoy blueberry chia seed jam! For the full recipe, check out the details above. {{image_2}} You can easily change this jam by using other fruits. - Mixed berry chia seed jam: Combine blueberries with strawberries or raspberries. This mix gives a colorful jam with bright flavors. - Citrus-infused blueberry jam: Add a bit of orange or lemon zest for a fresh taste. The zest brightens up the blueberries and adds a nice twist. You can switch up the sweetener for a different flavor. - Using different natural sweeteners: Try honey, agave nectar, or coconut sugar. Each sweetener gives the jam a unique taste. - Sugar-free options: Use stevia or monk fruit sweetener for a low-calorie jam. These options keep the flavor while cutting sugar. Making a low-sugar version is simple and tasty. - Reducing sweetener without affecting taste: Start by cutting the maple syrup by half. Taste the jam and adjust as needed. You can still enjoy the fruit's natural sweetness. - Substitutes for low-sugar diets: Use erythritol or allulose as sweeteners. These options can keep the jam sweet without adding sugar. Feel free to explore these ideas to make your own twist on blueberry chia seed jam! For the full recipe, check out the main article. To keep your blueberry chia seed jam fresh, store it in the fridge. Use a clean glass jar with a tight lid. This helps keep air out and prevents spoilage. Make sure the jar is dry before filling it. I recommend using a 12-ounce mason jar for easy pouring and serving. You can freeze blueberry chia seed jam for up to six months. Just pour the jam into a freezer-safe container, leaving some space at the top. This space helps the jam expand as it freezes. When you're ready to use it, thaw it in the fridge overnight. For quick thawing, place the container in a bowl of warm water. The jam lasts about two weeks in the fridge. If you see any mold or off smells, it’s time to toss it. Freshness is key to enjoying this tasty treat. Always check for signs of spoilage before using. Homemade blueberry chia seed jam lasts about two weeks in the fridge. Store it in a clean jar with a tight lid. After that time, it may spoil. Always check for any off smells or changes in color before using it. Yes, you can use frozen blueberries! Just thaw them before cooking. They work well and still give great flavor. This is a handy option if fresh blueberries are not available. Yes, chia seed jam is safe for kids. Chia seeds are rich in fiber and healthy fats. If your child has allergies, check with a doctor first. Always watch for choking hazards with small seeds. You can use leftover chia seeds in many ways! Add them to smoothies, oatmeal, or yogurt. They boost nutrition and add a nice crunch. You can also use them in baking or as a thickener for soups. Yes, you can can blueberry chia seed jam for longer storage. Follow proper canning procedures for safety. Make sure to sterilize jars and lids. Canned jam lasts for up to a year when stored in a cool, dark place. Making blueberry chia seed jam is simple and fun. You need fresh or frozen blueberries, sweetener, chia seeds, and a few extras. The steps are easy: mash, mix, boil, and cool. There are many ways to customize your jam with spices and other fruits. Proper storage keeps it fresh, and you can even freeze it. This jam is a great treat on toast or yogurt. Experiment with flavors and enjoy the process! Your jam will taste better than store-bought, and you made it yourself.

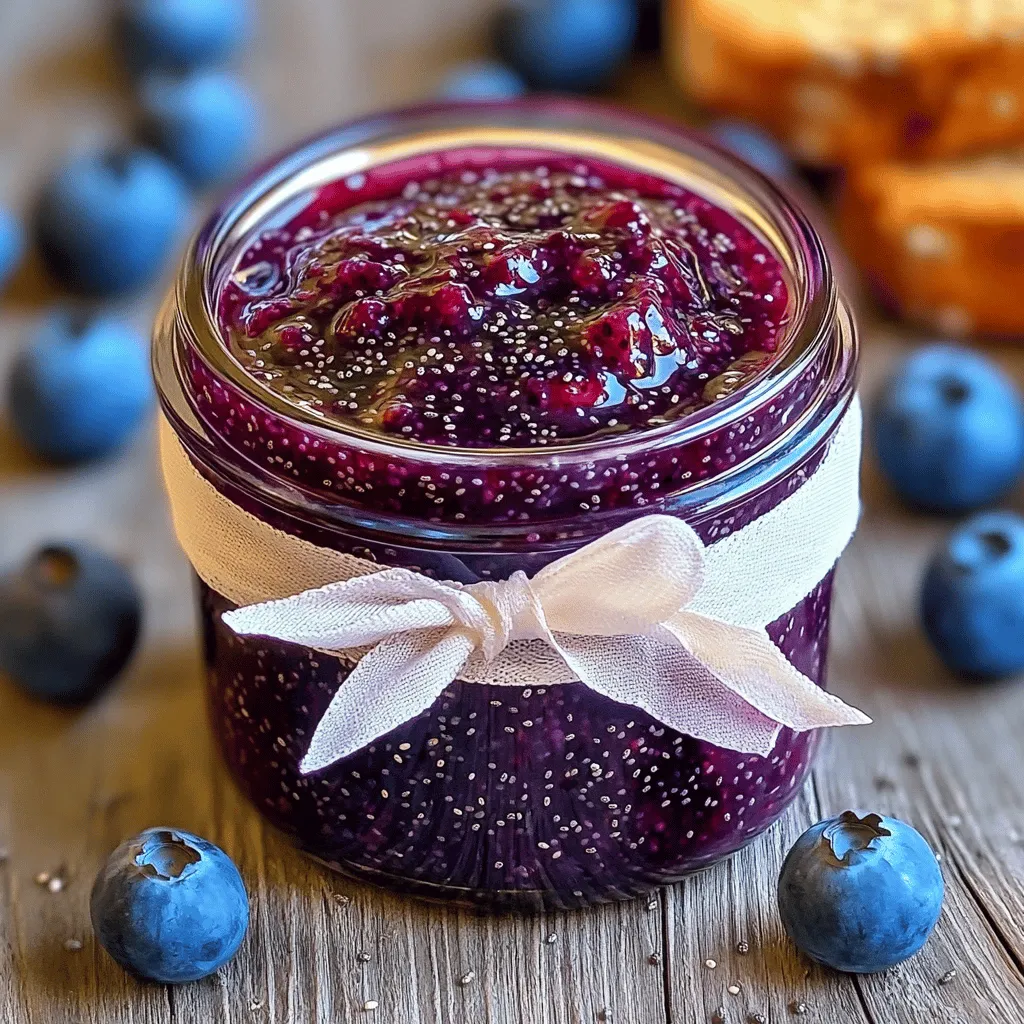
Blueberry Chia Seed Jam Easy and Healthy Recipe

Looking for a healthy and easy jam recipe? You’ve found it! This Blueberry Chia Seed Jam is not only delicious but also simple to…

My Latest Desserts


hey,

i’m Ava!

I’m so happy you’re here!

I pour heart and skill into every recipe I create. I know you’ll taste the difference now let’s enjoy this flavorful adventure together.

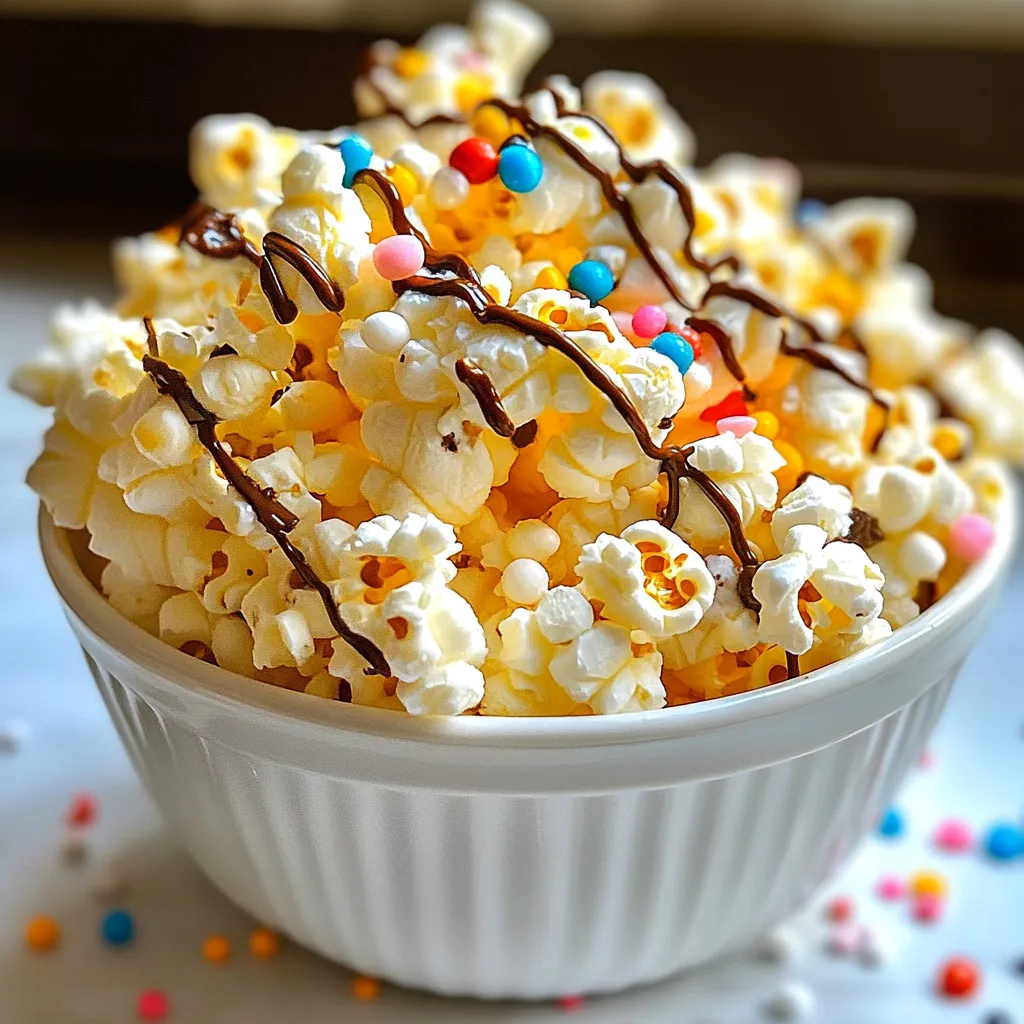
Marshmallow Popcorn Delight Simple Sweet Snack Idea

If you’re looking for a fun and easy snack idea, you’ve hit the sweet spot! Marshmallow Popcorn is a delicious blend of crunchy popcorn…

To make Marshmallow Popcorn, gather these items: - 1/2 cup popcorn kernels - 1/4 cup unsalted butter - 1 bag (10 oz) mini marshmallows - 1/2 teaspoon vanilla extract - 1/2 teaspoon salt - 1/2 cup chocolate chips (optional) - Colored sprinkles (optional for added fun) If you have dietary needs, here are some swaps: - Use coconut oil instead of unsalted butter for a dairy-free option. - Choose vegan mini marshmallows for a vegan treat. - Replace chocolate chips with dairy-free chips if needed. I recommend these brands for great results: - Popcorn kernels: Orville Redenbacher’s or Amish Country. - Mini marshmallows: Jet-Puffed or Dandies (vegan option). - Chocolate chips: Ghirardelli or Enjoy Life (for dairy-free). These ingredients will help you create a tasty treat that everyone will enjoy! {{ingredient_image_1}} To start, you need to pop the popcorn. You can use a popcorn maker or a large pot. If you use a pot, heat it over medium heat. Add the popcorn kernels and cover it with a lid. Shake the pot gently as it pops. This helps prevent burning. Once the popping slows down, remove it from the heat. Pour the popped popcorn into a large mixing bowl. Make sure to set it aside for later. Now, let’s make the marshmallow mixture. In a medium saucepan, melt the unsalted butter over medium heat. Once it is melted, add the mini marshmallows. Stir constantly until the marshmallows turn smooth. This should only take a few minutes. Next, remove the pan from heat. Stir in the vanilla extract and salt for extra flavor. Mix well to combine. It’s time to coat the popcorn! Pour the melted marshmallow mixture over the popped popcorn. Use a spatula or your hands to mix. If you use your hands, make sure to coat them in butter or oil first. This helps prevent sticking. Gently fold the popcorn until every piece is coated. If you want, sprinkle chocolate chips over the warm popcorn. Mix gently again to let them melt slightly. For some added fun, sprinkle colored sprinkles on top. Spread the popcorn on a baking sheet lined with parchment paper. Let it cool for about 30 minutes. This helps the marshmallow set. After that, break it into clusters and enjoy! To make great popcorn, start with fresh kernels. Old kernels may not pop well. Use a popcorn maker or a large pot with a lid. Heat the oil before adding the kernels. This helps them pop evenly. Shake the pot gently while popping. This keeps the heat even and prevents burning. To keep popcorn from sticking, coat your hands with butter or oil. This helps when mixing the marshmallow mixture. Use a large bowl to mix the popcorn. This gives you space to fold without making a mess. Stir gently to avoid breaking the popcorn. If you notice clumps, break them apart carefully with your hands. You can add more flavor to your popcorn. Try mixing in peanut butter for a nutty taste. Drizzling melted chocolate can add sweetness and richness. Experiment with other toppings like cinnamon or coconut. Colored sprinkles not only add fun but also a nice crunch. The more you mix, the more fun your popcorn becomes! Pro Tips Use Fresh Kernels: For the best popping results, ensure that your popcorn kernels are fresh. Old kernels may not pop well, leading to a disappointing texture. Control the Heat: When melting the marshmallows, keep the heat at medium to prevent burning. Stir constantly to achieve a smooth, creamy mixture. Coat Your Hands: If using your hands to mix the popcorn and marshmallow, coat them with butter or oil to prevent the mixture from sticking. Experiment with Flavors: Feel free to customize your Marshmallow Madness Popcorn with different flavors, such as adding peanut butter or a sprinkle of cinnamon for a unique twist! {{image_2}} You can easily change the taste of marshmallow popcorn. Try mixing in peanut butter for a nutty twist. Melt 1/4 cup of peanut butter with the marshmallows. You can also use caramel sauce for a sweet drizzle. Just pour it over before mixing in the popcorn. Chocolate lovers can add chocolate chips to make it extra special. Make your marshmallow popcorn more fun with colorful add-ins. Seasonal sprinkles add joy and flair. Use red and green sprinkles for holidays or pastel colors for spring. You can even mix in mini candies like M&Ms or gummy bears. This makes it look festive and tasty. Want a healthier option? You can reduce the sugar by using less marshmallows. Try using 8 oz instead of 10 oz. You can also use air-popped popcorn instead of buttered popcorn. For a different flavor, swap the butter for coconut oil. It adds a light taste and keeps it healthier. To keep your leftover marshmallow popcorn fresh, first let it cool completely. Place it in an airtight container. This helps to keep moisture out and maintain the popcorn's texture. You can also use a large zip-top bag if you don’t have a container. Store the container in a cool, dry place. Avoid areas with heat or humidity. If you notice any popcorn becoming stale, you can revive it. Just pop it in the oven at a low temperature for a few minutes. This brings back some crispness. Marshmallow popcorn stays fresh for about 3 to 5 days at room temperature. For longer storage, you can freeze it. Place the popcorn in an airtight bag or container. It can last for up to 3 months in the freezer. To enjoy, let it thaw at room temperature for a few hours before eating. Yes, you can use microwave popcorn. It saves time and effort. Just remember to check the flavor. Some brands add butter or salt. Choose plain popcorn for the best results. You can use coconut oil or vegan butter. Both options work well. They will create a similar texture and flavor. Another choice is margarine. Just make sure it melts smoothly. You can use a microwave to melt the marshmallows. Place mini marshmallows and butter in a microwave-safe bowl. Heat in 30-second bursts, stirring in between. Once melted, mix with the popcorn. It depends on the ingredients. Use vegan butter and check the marshmallow brand. Some marshmallows contain gelatin, which is not vegan. Look for vegan-friendly marshmallows to enjoy this treat. In this post, we covered how to make tasty marshmallow popcorn. We talked about key ingredients, step-by-step instructions, and some helpful tips. You learned about flavor twists and ways to keep it fresh. My final thought is that making this treat can be fun and easy. Get creative with flavors and enjoy the process, whether with family or friends. You’ll love how simple and tasty it can be!